Follow Me On Social Media!
How to Make Glazed Walnuts: The Easy Snack You’ll Love
Introduction to How to Make Glazed Walnuts
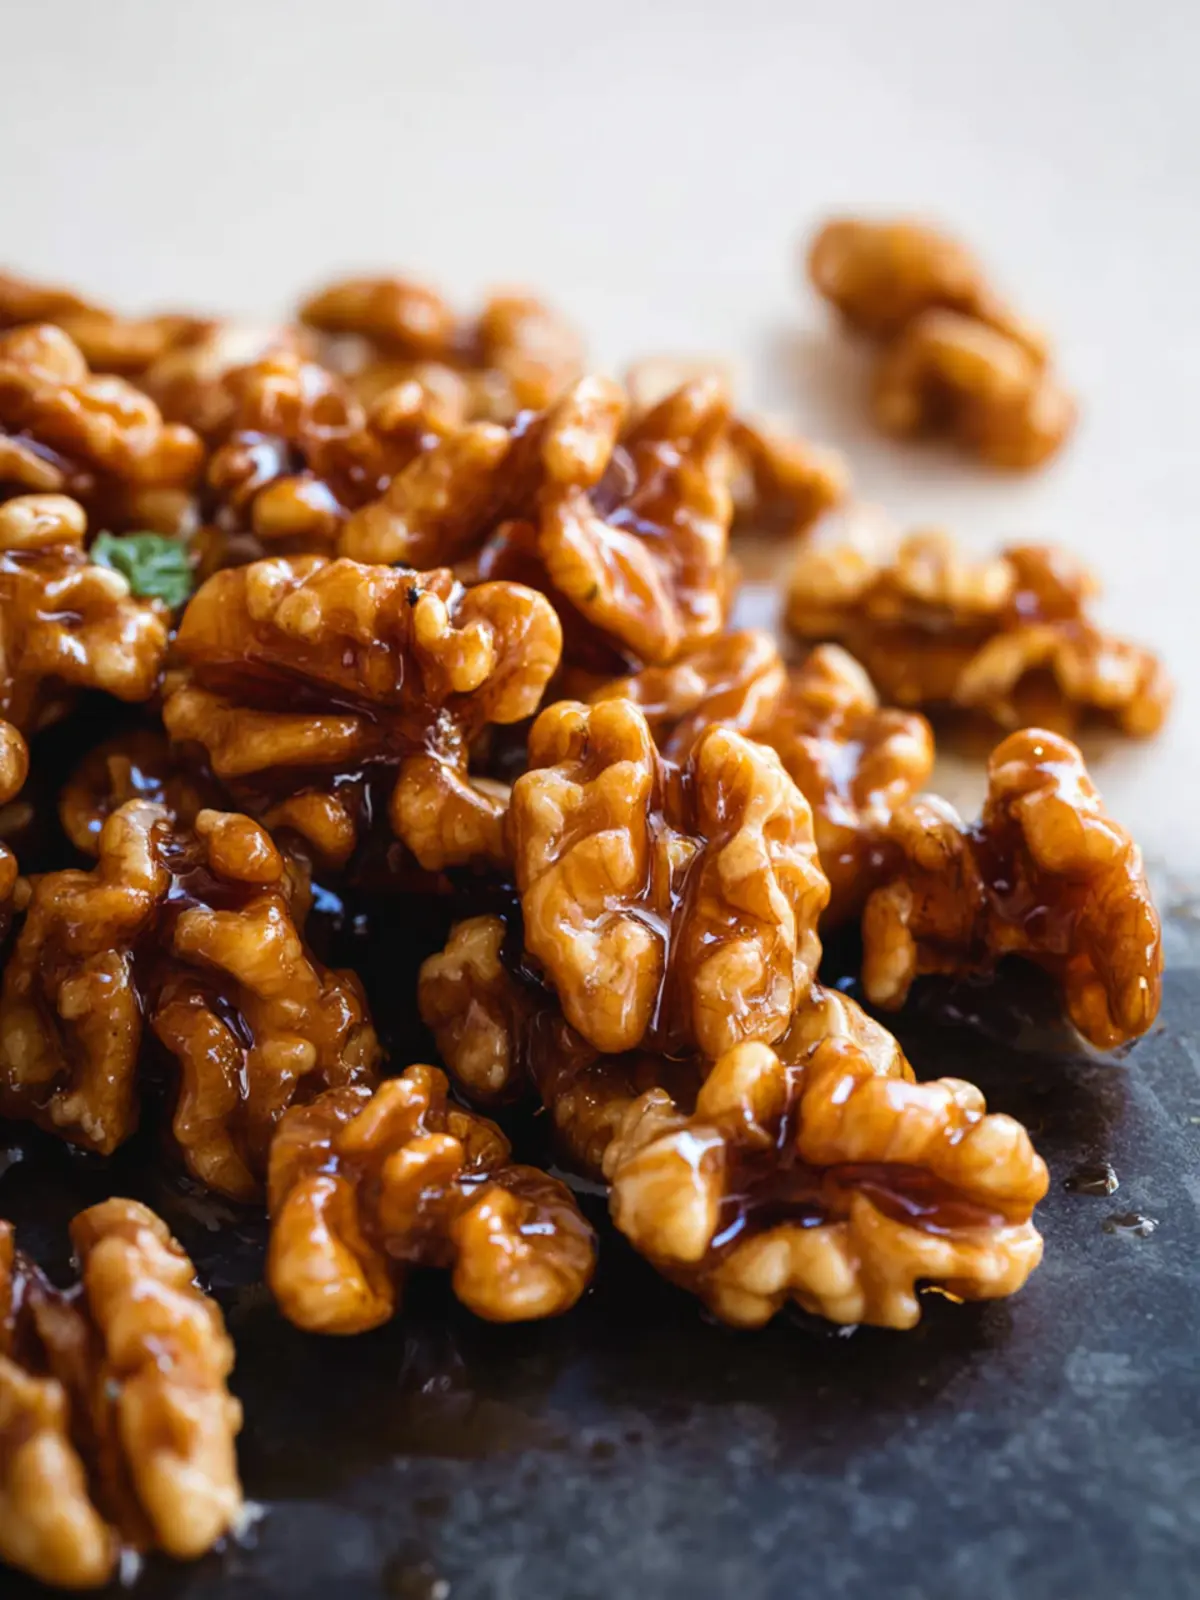
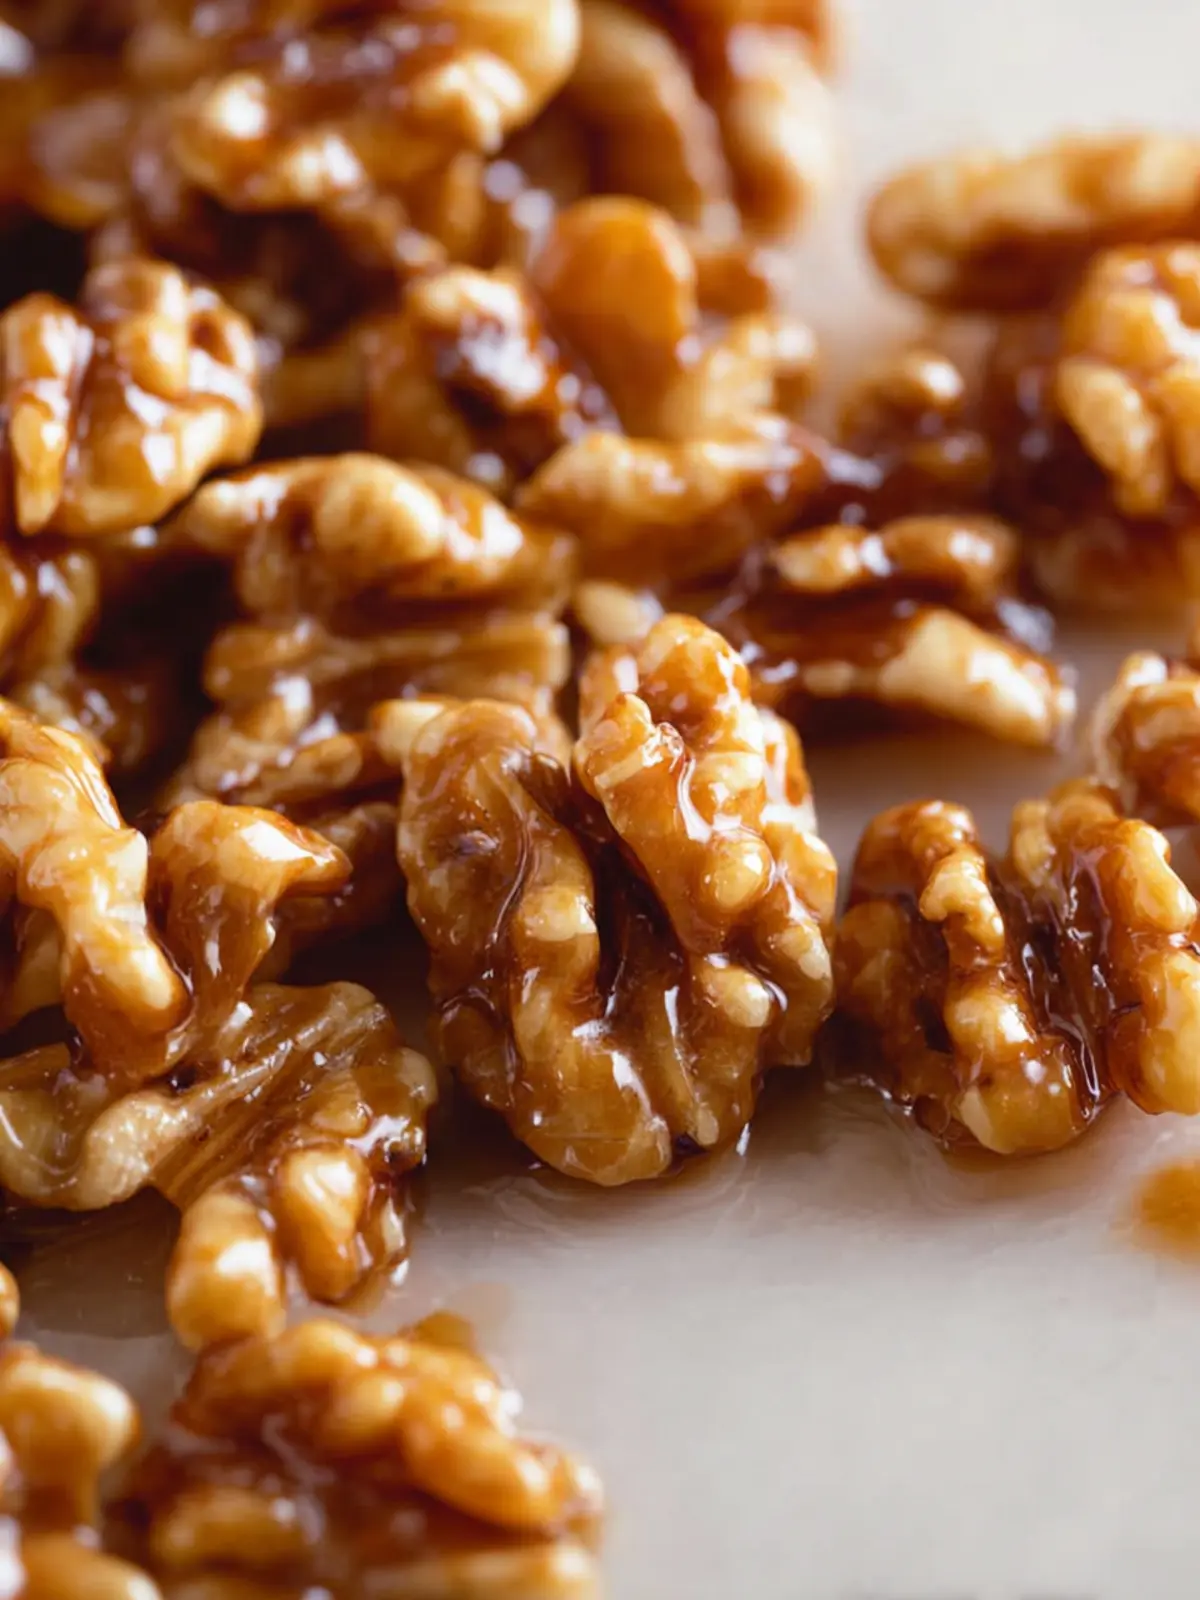
When you discover how to make glazed walnuts, it’s like opening a treasure chest in the world of culinary delights. These sweet, crunchy morsels are not just a treat but a versatile addition to your kitchen arsenal. Imagine tossing them into a refreshing salad to add a delightful crunch, or sprinkling them over desserts for a gourmet touch. Their sweet and nutty flavor profile can elevate even the simplest dishes into something extraordinary.
Learning the art of making glazed walnuts is both simple and quick, making it perfect for busy young professionals who still crave a touch of gourmet cuisine in their everyday meals. With just a handful of ingredients, you can create a deliciously addictive snack or topping that is sure to impress. Who knew that a few walnuts, some sugar, and a little bit of time could yield such delightful results?
Why are glazed walnuts a game changer in the kitchen?
Incorporating glazed walnuts into your recipes can transform ordinary meals. Not only do they add a satisfying crunch, but their sugary glaze provides a sweet contrast that can balance savory flavors in dishes. Here are a few reasons why you should consider whipping up a batch:
-
Versatile Use: Glazed walnuts can be sprinkled on salads, mixed into baked goods, or enjoyed on their own as a quick snack. Their adaptability makes them a kitchen staple.
-
Health Benefits: Nuts are packed with nutrients. Walnuts are high in omega-3 fatty acids, antioxidants, and essential vitamins, making them a healthy choice when consumed in moderation.
-
Quick Process: The beauty of learning how to make glazed walnuts lies in the simplicity of the recipe. With just a few steps and minimal preparation, you can serve up a delicious treat in under 30 minutes!
-
Impressive Presentation: Whether you’re hosting a dinner party or preparing a meal for yourself, a sprinkle of glazed walnuts adds an upscale touch to your presentation.
Ready to impress your taste buds and elevate your dishes? Dive into the recipe that will revolutionize your use of nuts in the kitchen!
Key Ingredients for How to Make Glazed Walnuts
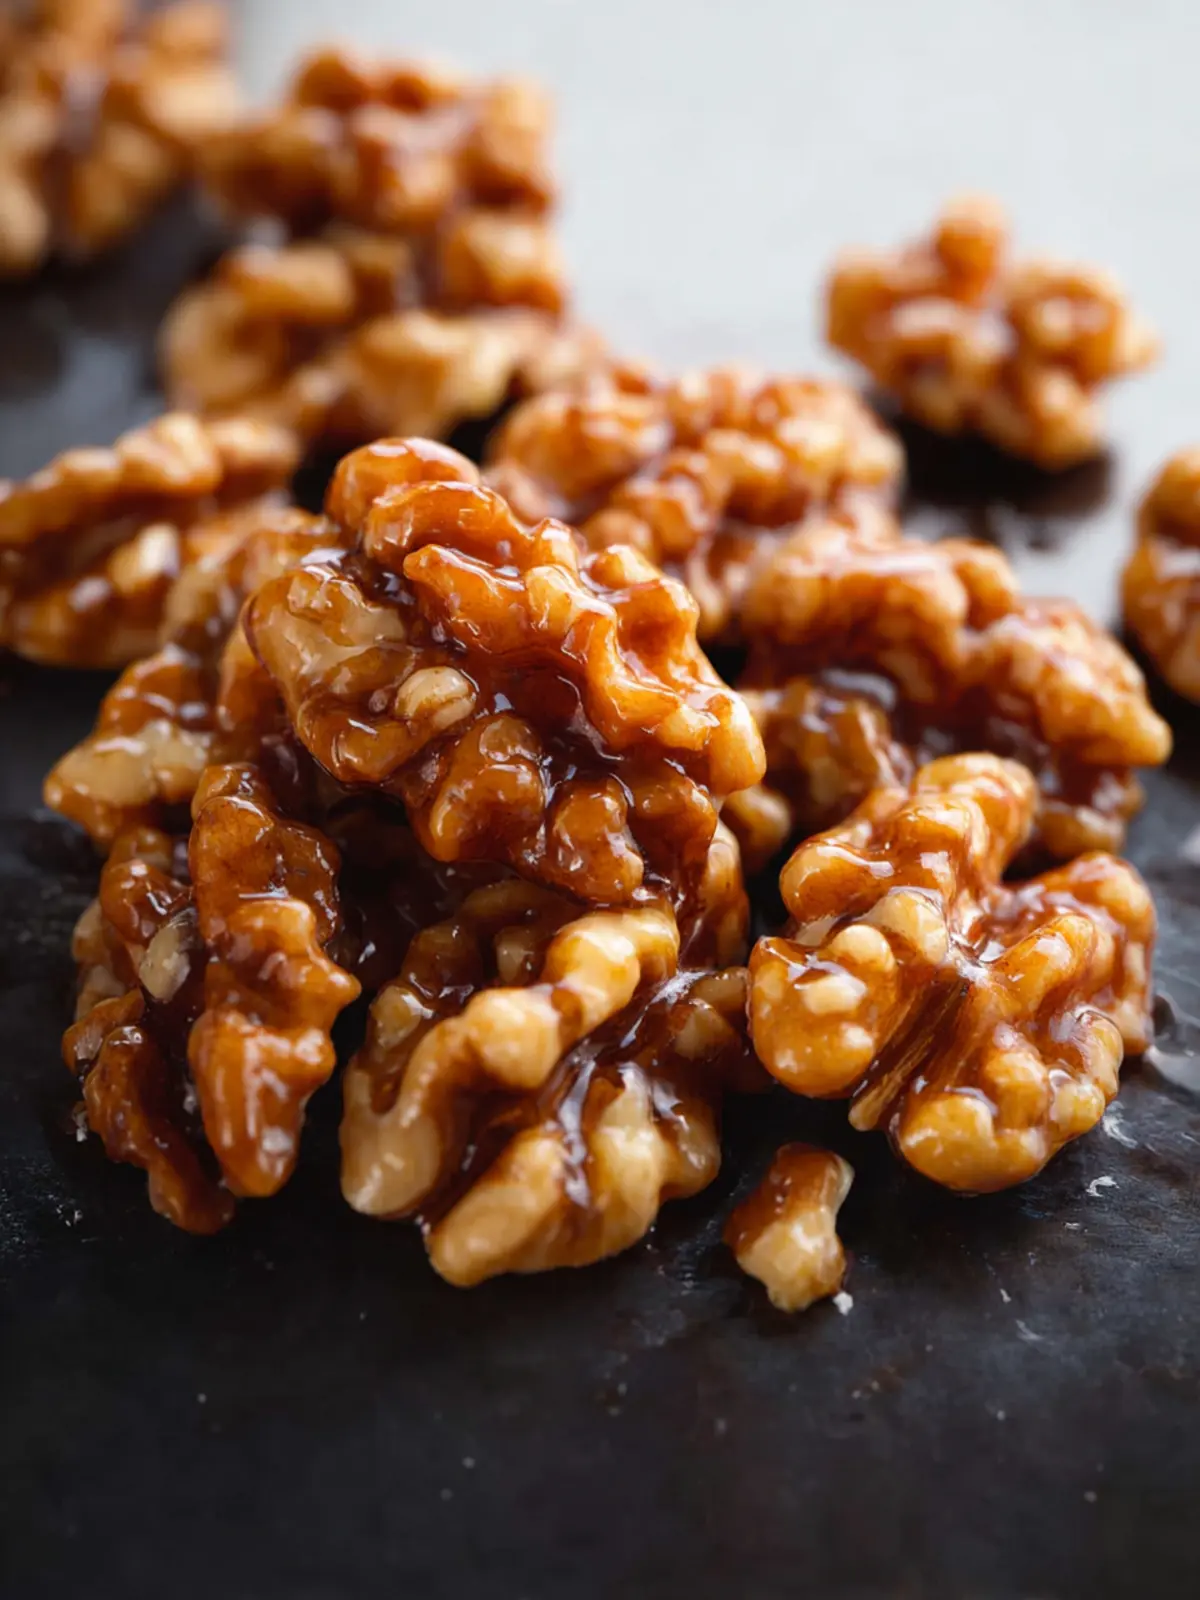
Walnuts
When diving into the world of glazed walnuts, the star of the show is undeniably the walnuts themselves. Opt for fresh, raw walnuts as they possess a delicate crunch and rich flavor. If you can, roast them lightly before glazing to enhance their nutty essence. It’s a quick step that I always find elevates the taste—much better than using outdated or stale nuts that can leave a bitter bite.
Pure Maple Syrup
For sweetness that sings, pure maple syrup is your go-to ingredient in this recipe for how to make glazed walnuts. Unlike other sweeteners, maple syrup has a warm, earthy flavor that beautifully complements the walnuts. Choose grade A maple syrup for its lighter taste or grade B for a more robust profile. Both will lend unique accents to your finished treat.
Kosher Salt
A pinch of kosher salt might seem like a small detail, but it plays a crucial role in balancing the sweetness of the maple syrup. This seasoning highlights the natural flavors of the walnuts, creating a delightful contrast. Trust me—once you’ve tried this combination, you’ll never overlook the magic of salt in sweet dishes again!
Why You’ll Love This Recipe
A quick and easy treat
There’s something undeniably satisfying about learning how to make glazed walnuts at home, and trust me, once you try it, you’ll be hooked. Imagine walking into your kitchen and being enveloped by the warm, sweet aroma of caramelizing nuts. These glazed walnuts are not just simple to whip up; they transform ordinary snacking into a delightful culinary moment.
- Speedy Preparation: In just 15 minutes, you can create a gourmet treat that’s perfect for any occasion, whether it’s a movie night or a surprise guest.
- Versatile Use: From adding a crunchy twist to your salad to being a stunning addition to your cheese board, the possibilities are endless. You can even toss them into your morning yogurt or oatmeal for an extra protein boost.
- Natural Sweetness: The blend of sugar and nuts creates a naturally sweet snack, offering a healthier alternative to traditional candies or desserts.
- Customizable: Play around with spices or add a pinch of sea salt to take your glazed walnuts to the next level, ensuring every batch feels unique and tailored to your taste.
These aren’t just glazed walnuts; they’re magic in a bowl that will keep your taste buds dancing!
Variations
Exploring how to make glazed walnuts can lead you down some delightful culinary paths. Each variation can bring a different twist to this simple yet scrumptious recipe.
Different nuts
While walnuts are the star ingredient, feel free to switch things up with other nuts like pecans, almonds, or cashews. Each nut has its own flavor profile and crunch, giving your glaze a unique character. For instance, pecans deliver a slightly sweeter taste, which pairs beautifully with the sugary glaze. Just keep an eye on the roasting time, as nut sizes can vary.
Sweetener alternatives
If you’re looking to shake things up in the sweetness department, consider using alternatives like maple syrup, honey, or agave nectar. Each option will lend its distinct flavor to the glaze. Maple syrup, for instance, adds a rich, earthy tone that complements the nuts well, while honey can offer a floral note that’s equally delicious. Remember that different sweeteners may change the cooking times slightly, so a little experimentation might be required.
Spiced versions
Want to take your how to make glazed walnuts to the next level? Add spices! A pinch of cinnamon or nutmeg can deepen the flavor, while a dash of cayenne pepper can add a hint of heat for a surprising kick. Just mix your favorite spices into the sugar before starting, and watch how these little tweaks create a beautifully fragrant and enticing treat.
Cooking Tips and Notes
Creating glazed walnuts at home isn’t just about following a recipe; it’s about infusing a bit of joy into the process. You’ll relish the glossy, sweet treat you’ll end up with. Let’s talk about some tips that will elevate your nutty creation.
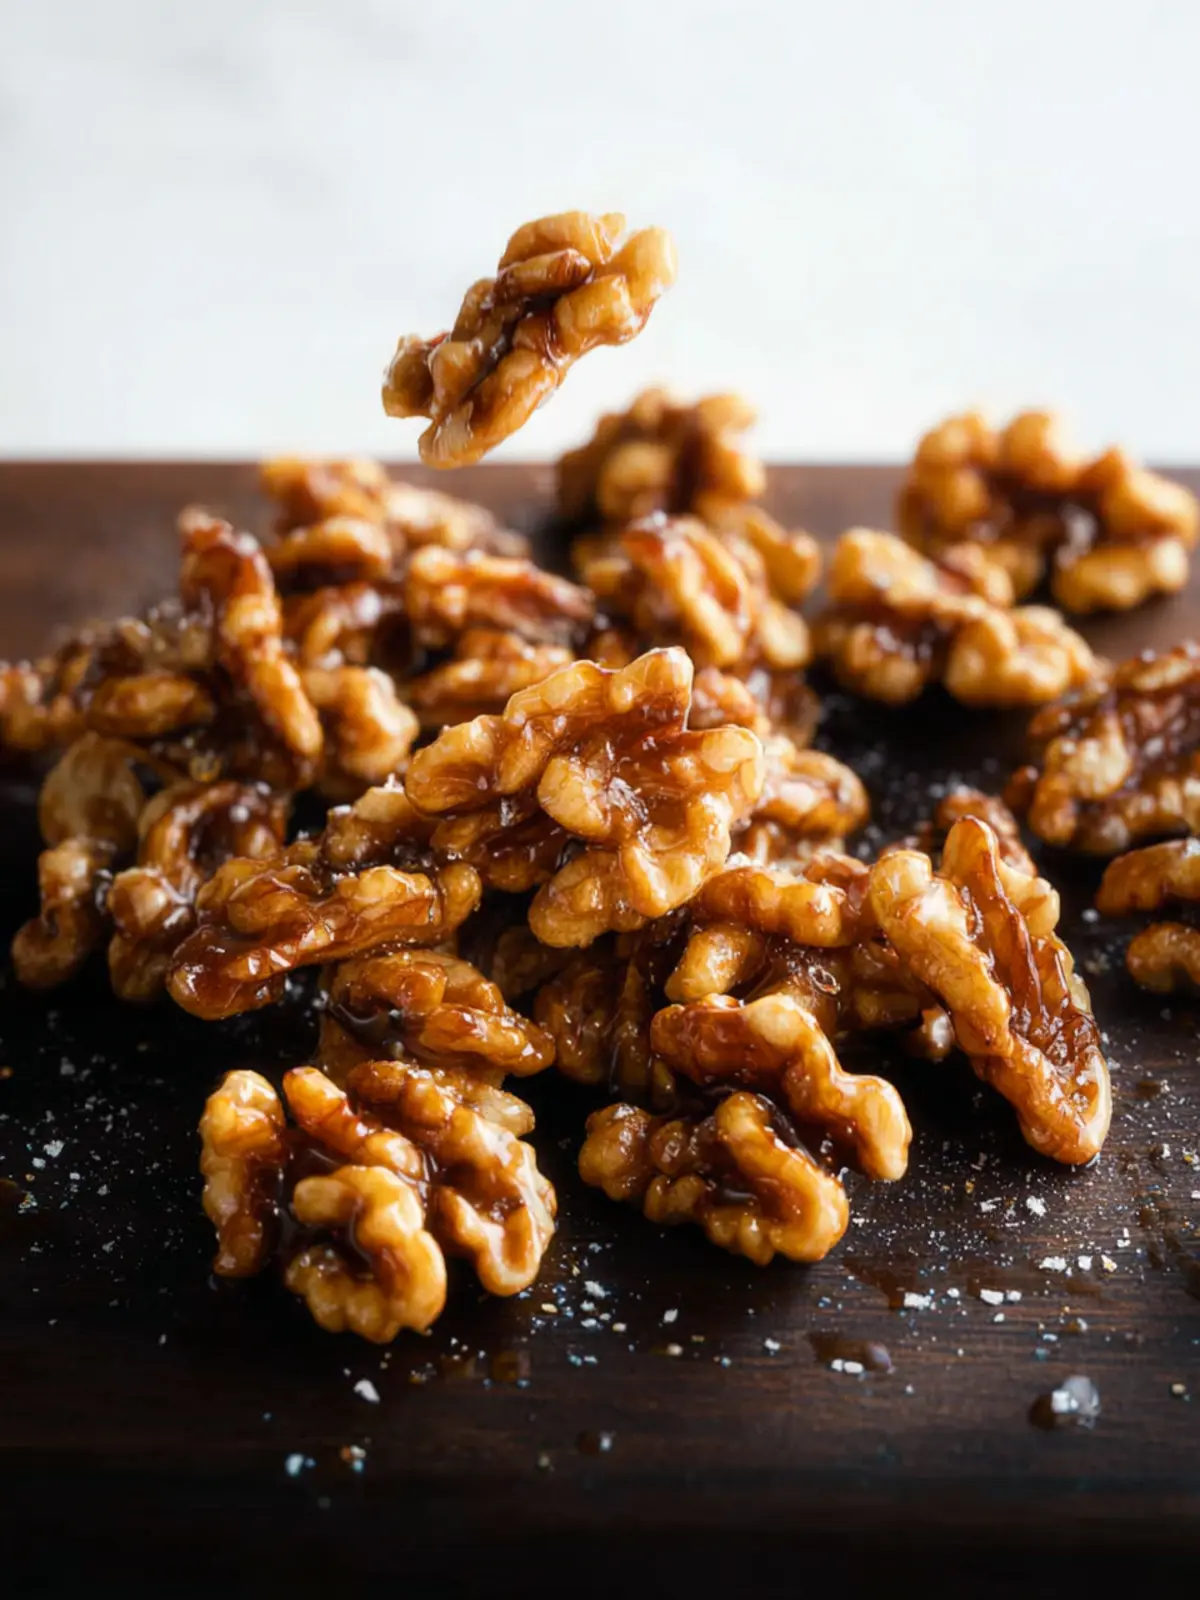
Ensuring glossy, clumped walnuts
To achieve that perfect glossy finish and delightful clumping, ensure you’re using just the right amount of sugar. If you notice your walnuts aren’t clumping as much as you’d like, a little extra heat can help caramelize the sugar more effectively. After cooking, allow them to sit for a few minutes on parchment paper before separating them. This will give them time to set and prevent sticking.
Storage tips
Once your glazed walnuts are cool, store them in an airtight container to maintain their crispiness. They can last up to two weeks, but they’re so delicious that they probably won’t stick around that long! If you find yourself with extra batches, consider freezing them: just let them cool, place them in freezer bags, and they’ll be good for a few months. When you’re ready to use them, simply toss them in a preheated oven for a few minutes to revive their crunchiness.
Enjoy the process, and let your creativity shine through!
Serving Suggestions
When you’re exploring how to make glazed walnuts, you’ll discover that these sweet crunchy treats are wonderfully versatile. Whether you enjoy them straight out of the bowl or dressed up in your favorite meals, glazed walnuts truly shine in a variety of settings.
Perfect Snacks and Toppings
Imagine the satisfying crunch of glazed walnuts as a mid-afternoon pick-me-up. They are perfect on their own, but here are some delicious ways to elevate them:
- Snack Bowl: Serve them in a cute bowl with your favorite dried fruits for a wholesome snack mix.
- On-the-Go: Toss them into your bag for a quick energy boost during busy days.
Pairing with Dishes
Glazed walnuts can take your meals to the next level. Their sweet and slightly salty flavor makes them a fabulous addition to:
- Salads: Top off a spinach salad with feta, berries, and vinaigrette for an irresistible crunch.
- Breakfast: Sprinkle them over yogurt or oatmeal for a delightful start to your day. A touch of honey and sliced bananas pairs beautifully with the nuts’ sweetness.
- Desserts: They are a fantastic topping for ice cream or as an ingredient in baked goods like muffins and cookies.
With these suggestions in mind, you can enjoy your glazed walnuts in a multitude of ways that will please your palate and impress your guests!
Time Breakdown for How to Make Glazed Walnuts
When you’re eager to whip up a batch of glazed walnuts, knowing exactly what to expect in terms of time can make the process even more enjoyable. In just a short span, you can transform ordinary walnuts into a delightful snack or topping that will impress your friends and family.
Preparation time
Getting started takes about 5 minutes. During this time, you’ll gather your ingredients and preheat the oven, setting the stage for deliciousness.
Cooking time
The cooking process takes roughly 10 to 15 minutes. This is when the magic happens—walnuts caramelizing and turning golden brown in your oven.
Total time
All said and done, you’re looking at around 15 to 20 minutes from start to finish. In no time, you’ll be enjoying your glazed walnuts—perfect for a quick snack or a topping for your favorite dish!
Nutritional Facts for How to Make Glazed Walnuts
When contemplating how to make glazed walnuts, it’s essential to understand the nutritional benefits these delicious bites offer. Packed with nutrients and flavor, they not only satisfy your sweet tooth but also contribute positively to your diet.
Calories
A serving of glazed walnuts typically contains around 200 calories. This makes them a tasty yet nutrient-dense option for a snack or dessert.
Fats
Walnuts are known for their healthy fats, offering about 20 grams per serving. These predominantly include polyunsaturated and monounsaturated fats, which are beneficial for heart health and can help reduce inflammation.
Carbohydrates
With approximately 4-5 grams of carbohydrates per serving, glazed walnuts provide a low-sugar option that’s perfect for those managing their carb intake. They’re natural sources of fiber, aiding digestion and promoting satiety.
FAQs about How to Make Glazed Walnuts
When diving into the delightful world of glazed walnuts, it’s natural to have questions. Whether you’re preparing them for a snack, a salad, or a dessert topping, let’s address some of the most common inquiries.
Can I use other nuts for this recipe?
Absolutely! While glazed walnuts bring a unique flavor and texture, you can experiment with various nuts like pecans, almonds, or cashews. Each nut will yield slightly different taste profiles, but the basic process remains the same. Just keep in mind that different nuts may require adjustments in cooking time, so stay vigilant to ensure they don’t over-brown.
What’s the best way to store glazed walnuts?
To maintain the delicious crunch and flavor of your glazed walnuts, it’s best to store them in an airtight container. Place them in a cool, dry place, like your kitchen pantry. If you want to keep them fresh for longer, storing them in the refrigerator can extend their shelf life. Just make sure they’re completely cooled before sealing them up.
How long do glazed walnuts last?
When stored properly, glazed walnuts can last for about two to three weeks at room temperature. In the fridge, they can stay fresh for up to a month. If you notice any signs of moisture or they start to lose their crunchiness, it’s a sign they’ve overstayed their welcome. Enjoy them while they’re at their best for a delightful snacking experience!
Conclusion on How to Make Glazed Walnuts
Creating your own glazed walnuts is a delightful undertaking that brings both flavor and crunch to your kitchen. The simple combination of walnuts, sugar, and a touch of butter brings out the nutty richness while creating a sweet, crispy coating that can elevate both desserts and savory dishes.
After you’ve experienced the satisfying process of preparing glazed walnuts, you can personalize them with your choice of seasonings, or use them as a topping on salads, desserts, or even as a snack on their own. Experiment and enjoy every bite—once you know how to make glazed walnuts, you’ll find countless ways to incorporate them into your culinary repertoire! Happy cooking!
Print
Maple Candied Walnuts
- Total Time: 15 minutes
- Yield: 4 servings 1x
- Diet: vegetarian
Description
Deliciously sweet and crunchy maple candied walnuts, perfect for snacking or adding to dishes.
Ingredients
Scale
- 1 cup raw walnuts
- 1/4 cup pure maple syrup
- 2 pinches kosher salt
Instructions
- Add the walnuts and maple syrup to a small non-stick skillet over medium heat.
- When the maple just starts to bubble, reduce the heat to low but still slowly bubbling.
- Simmer for about 6 to 8 minutes, stirring occasionally.
- In the last minute, when the maple syrup is mostly evaporated, stir continuously until the liquid is totally cooked out and the nuts start clumping together. (Watch the nuts so they don’t burn and become powdery, not glossy!)
- Immediately remove from the heat.
- Transfer the walnuts to a sheet of parchment paper in a single layer.
- Sprinkle with the salt and allow to cool to room temperature, about 5 minutes if eating right away and about 15 minutes if you want to store them for later use.
- Store in a covered container at room temperature.
Notes
- Ensure to watch the nuts closely while cooking to prevent burning.
- These candied walnuts can be stored for later use and are great for salads or snacks.
- Prep Time: 5 minutes
- Cook Time: 10 minutes
- Category: Snacks
- Method: stovetop
- Cuisine: American
Nutrition
- Serving Size: 1/4 cup
- Calories: 200
- Sugar: 12g
- Sodium: 10mg
- Fat: 18g
- Saturated Fat: 1.5g
- Unsaturated Fat: 15g
- Trans Fat: 0g
- Carbohydrates: 10g
- Fiber: 2g
- Protein: 5g
- Cholesterol: 0mg